Tutorial Create Frame
26 March 2026•By Anonymous
Tutorial for Creating Frames on Funcam.id
This guide explains the steps to create a custom photo frame on Funcam.id.
1. Frame Design Preparation
Before accessing the Funcam dashboard, prepare your frame file first. Design Requirements
⭐ Image format: PNG, JPG, WEBP, JPEG
⭐ High resolution recommended (HD)
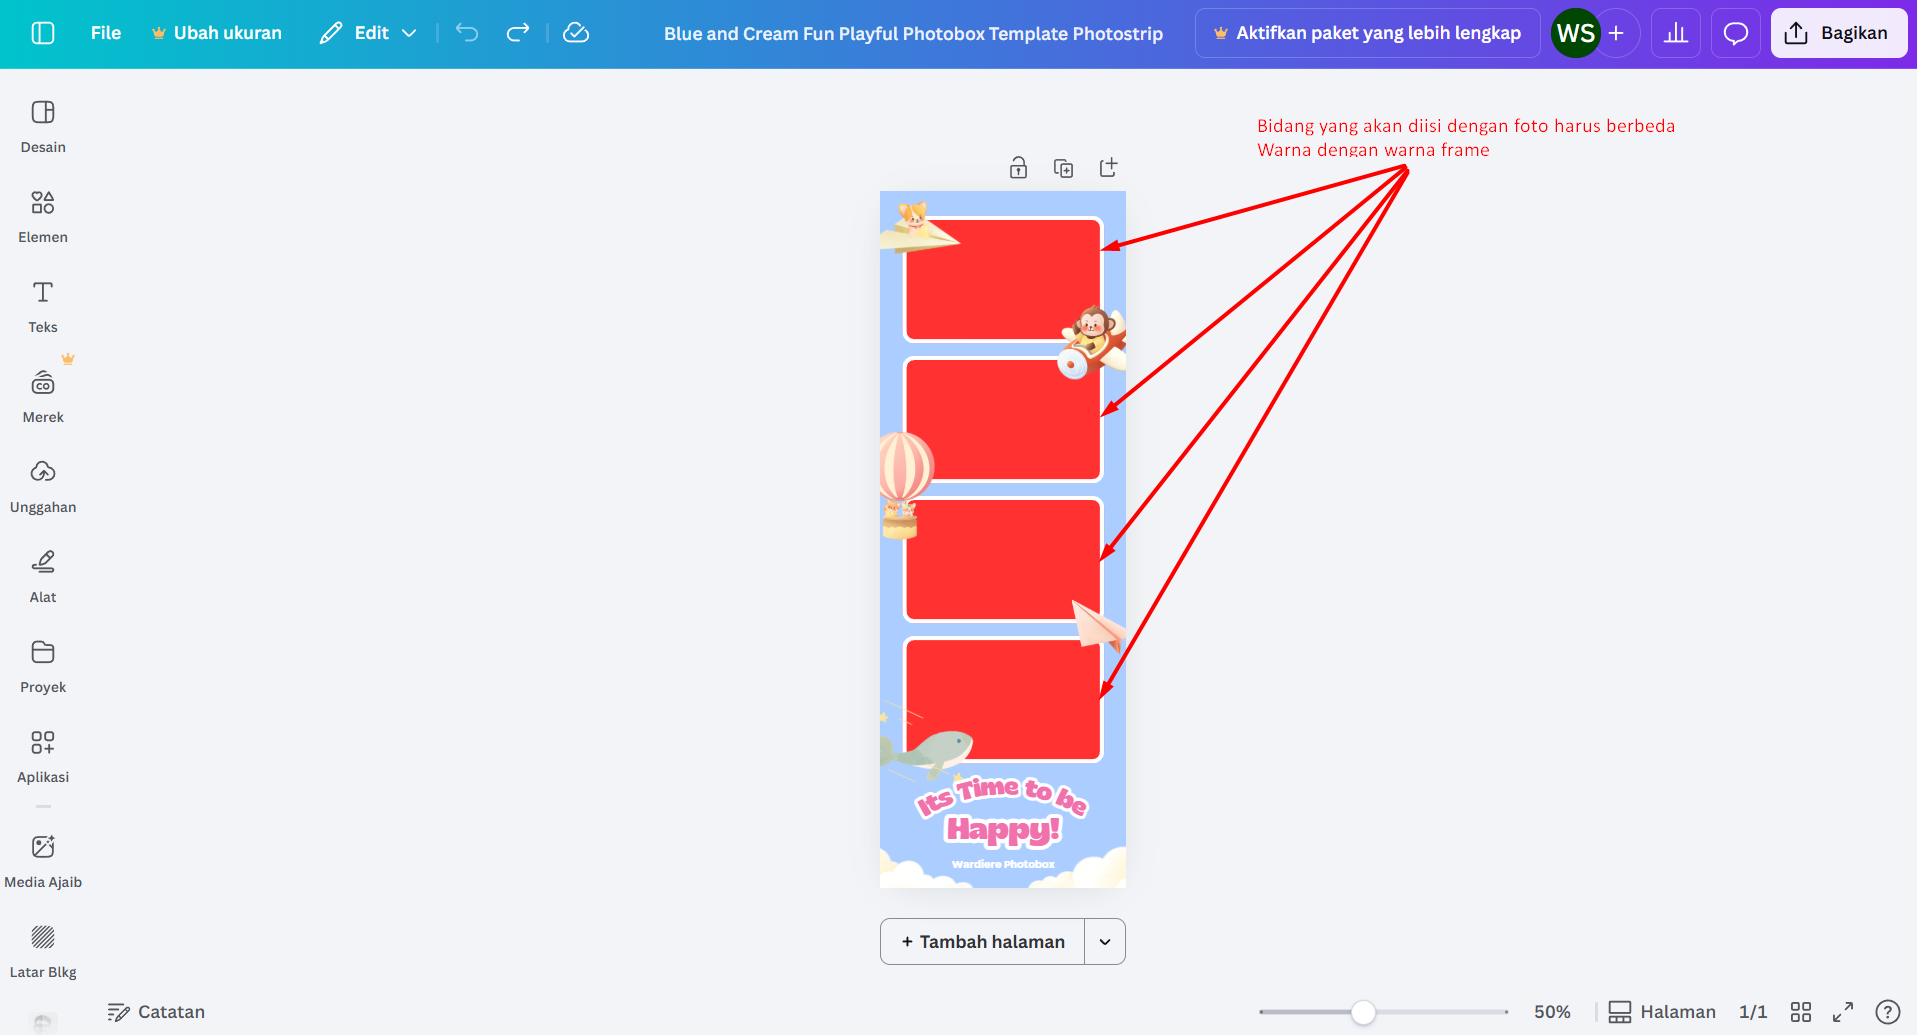
⭐ The area to be filled with a photo must be given a distinct solid color (example: red).
An example image that will be used as a Frame can be seen below 👇
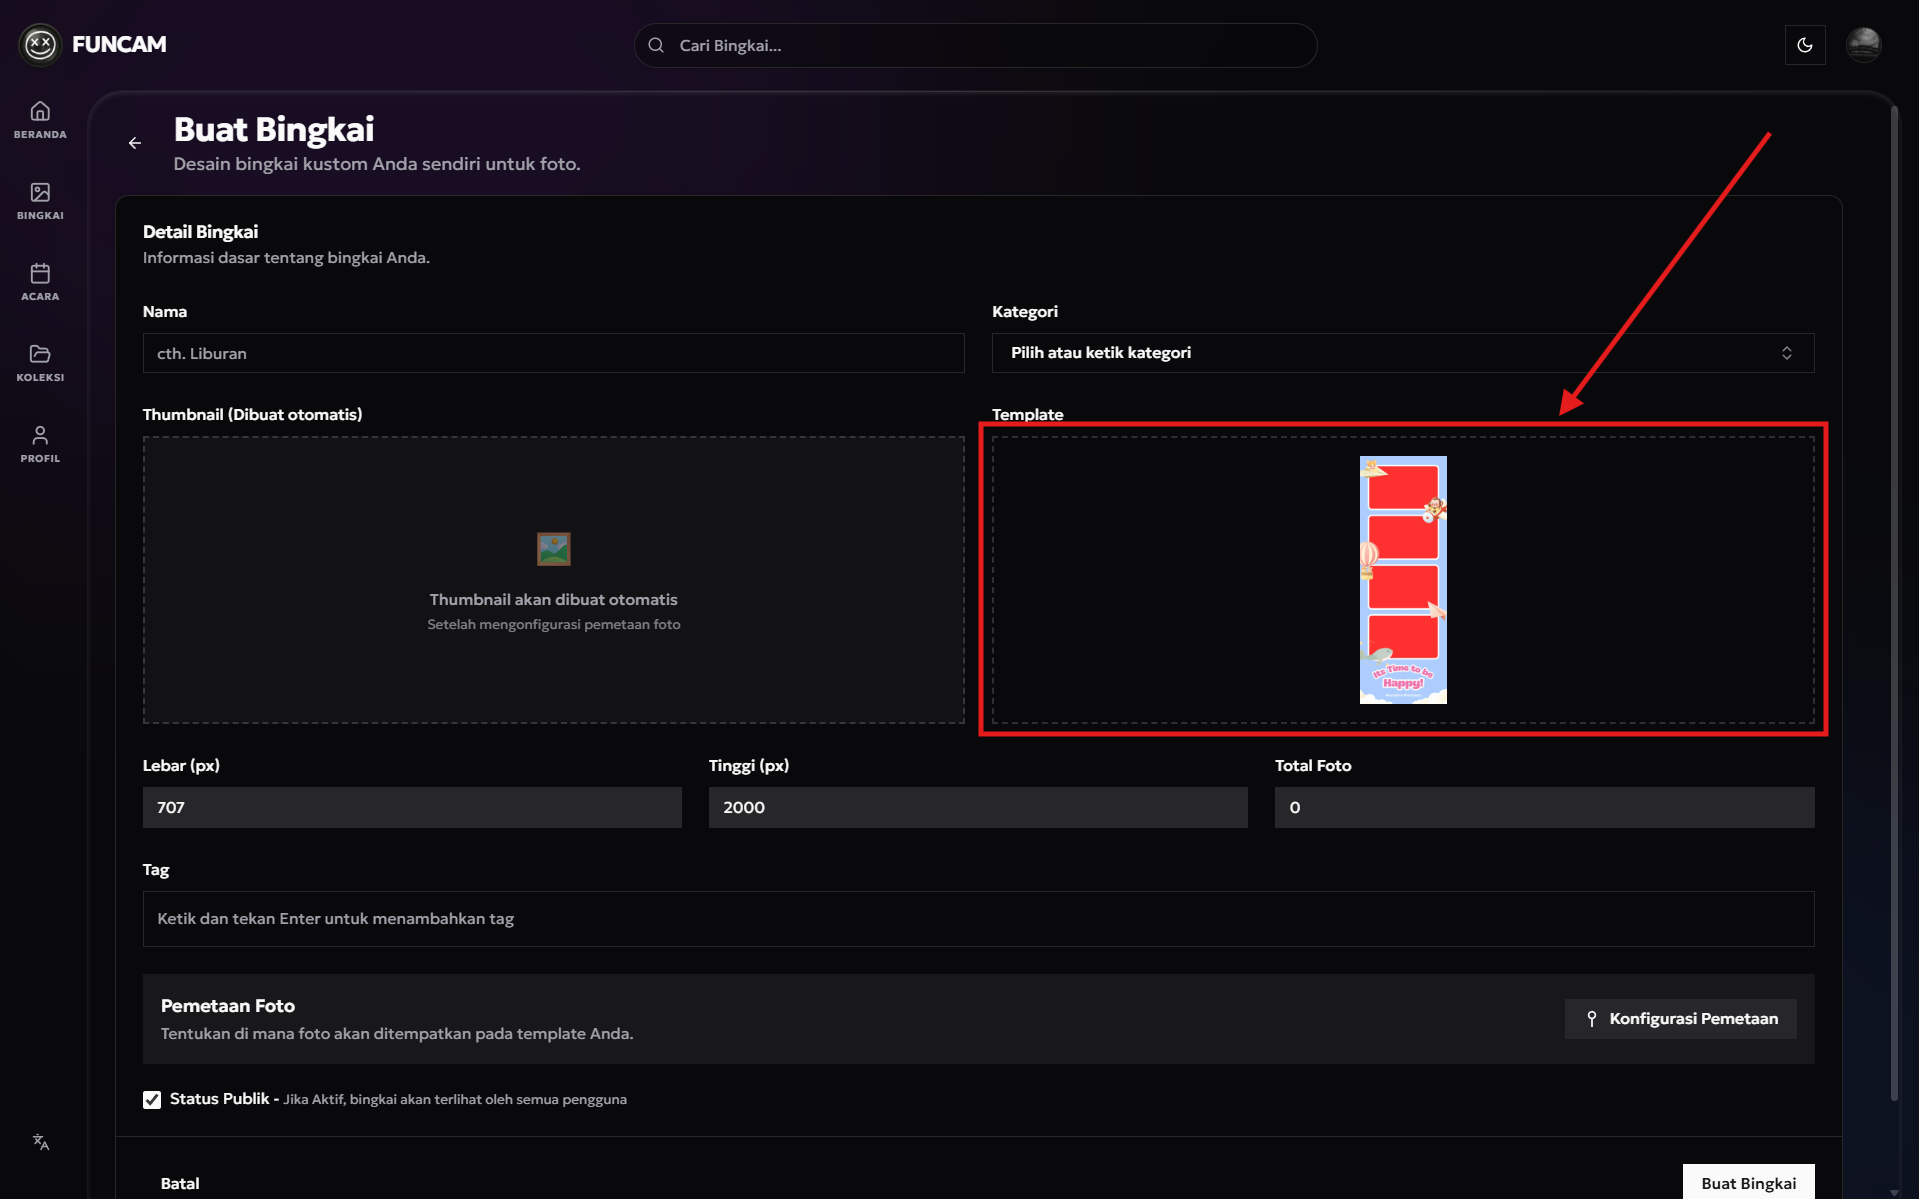
2. Upload & Publish Frame
1. Visit the Frame Creation Page on funcam.id.
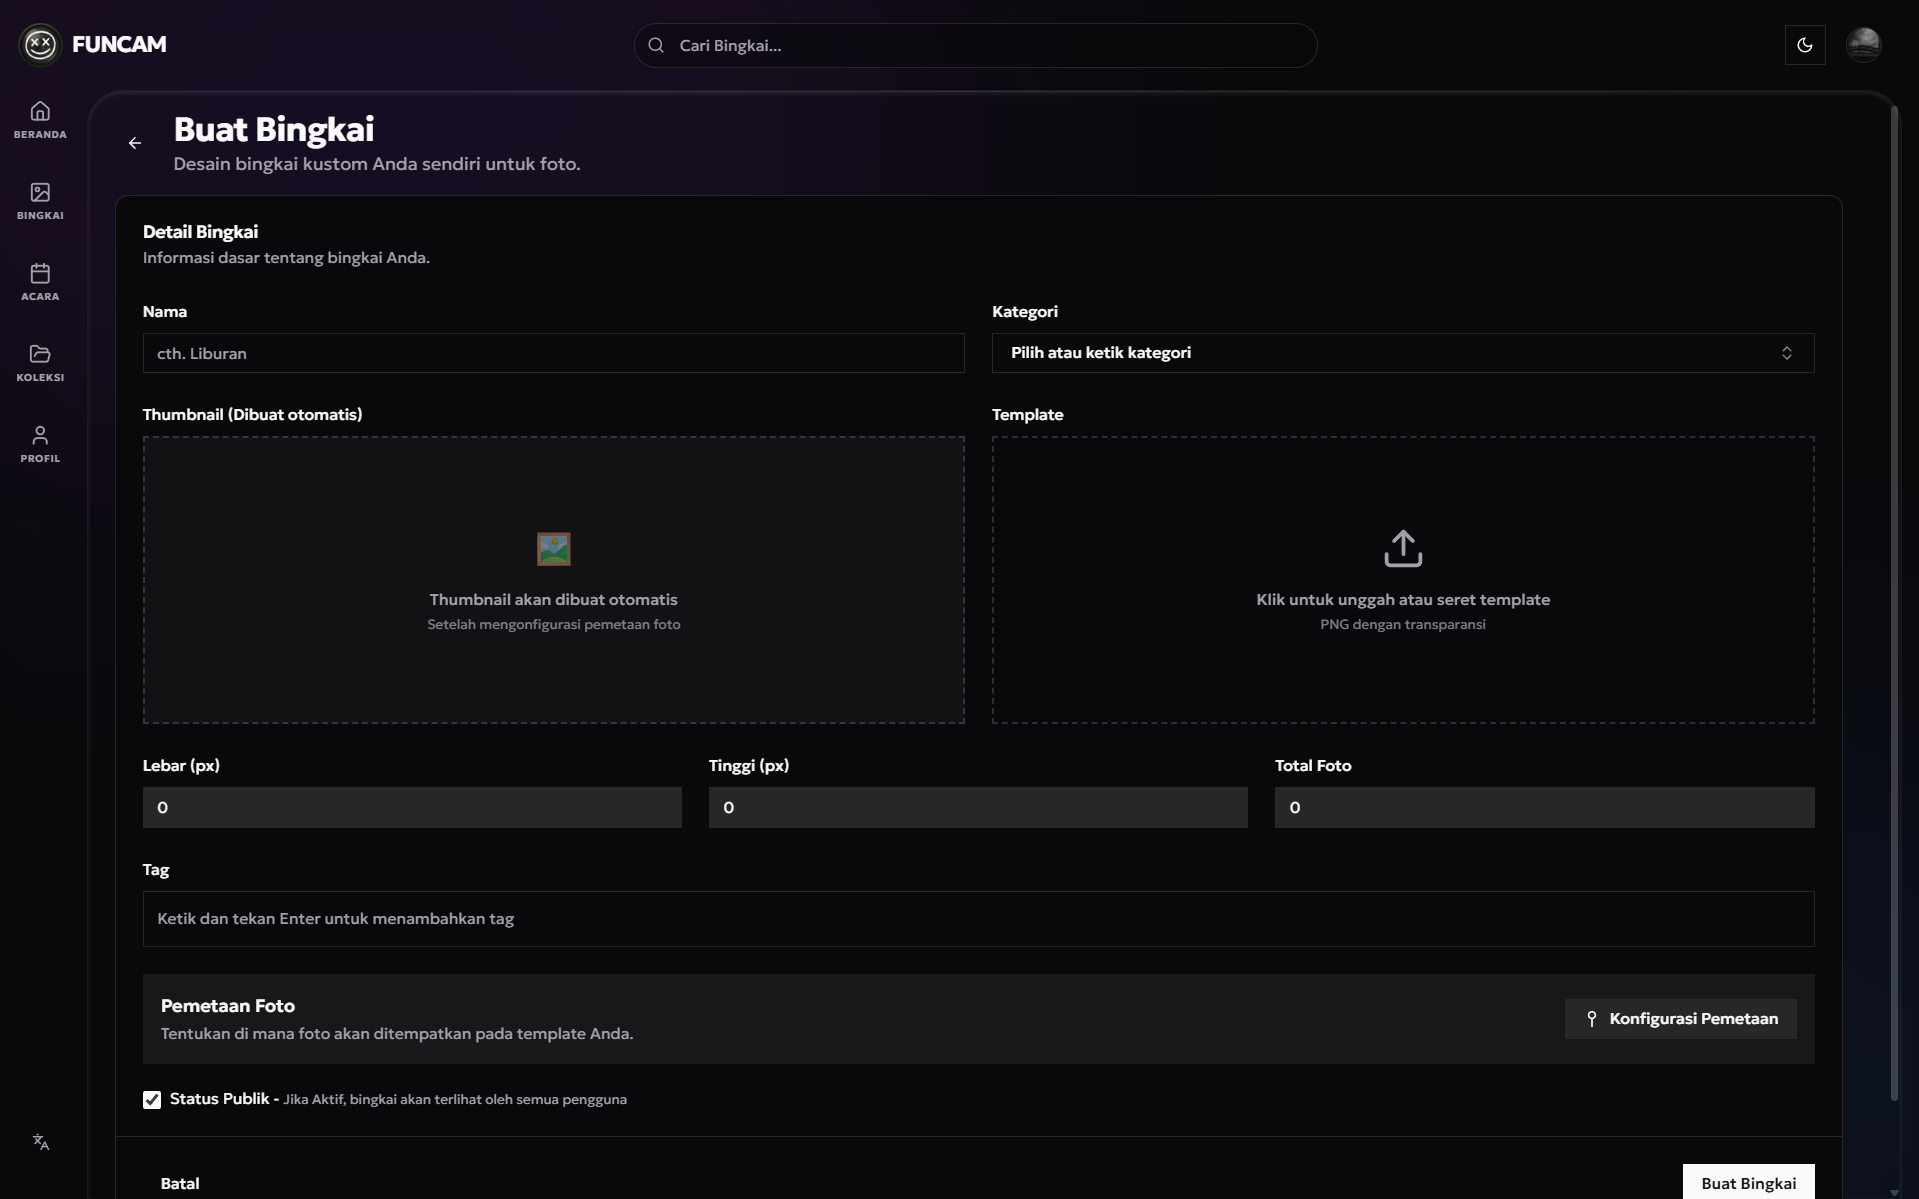
2. Upload the frame you have prepared.
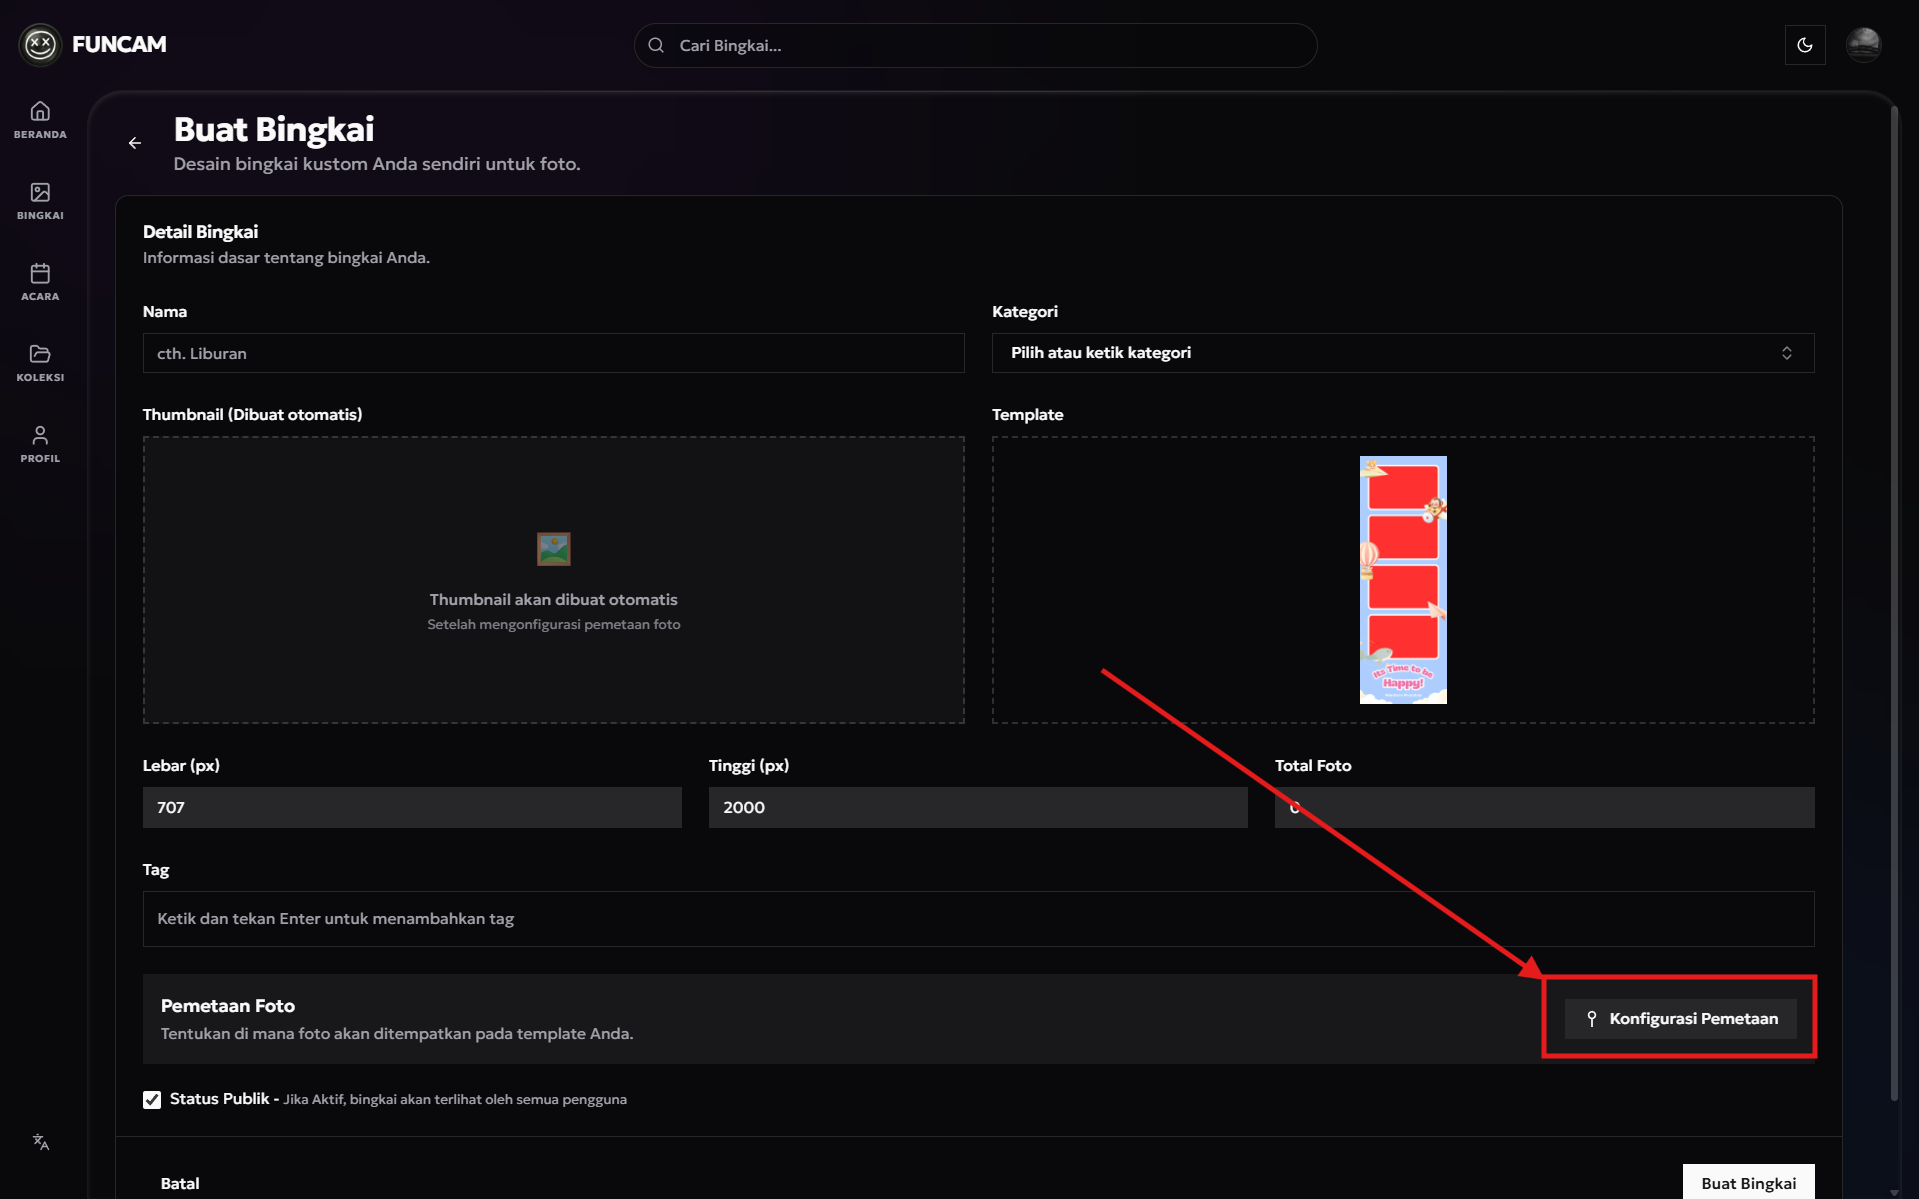
3. Mapping the area to be filled with a Photo
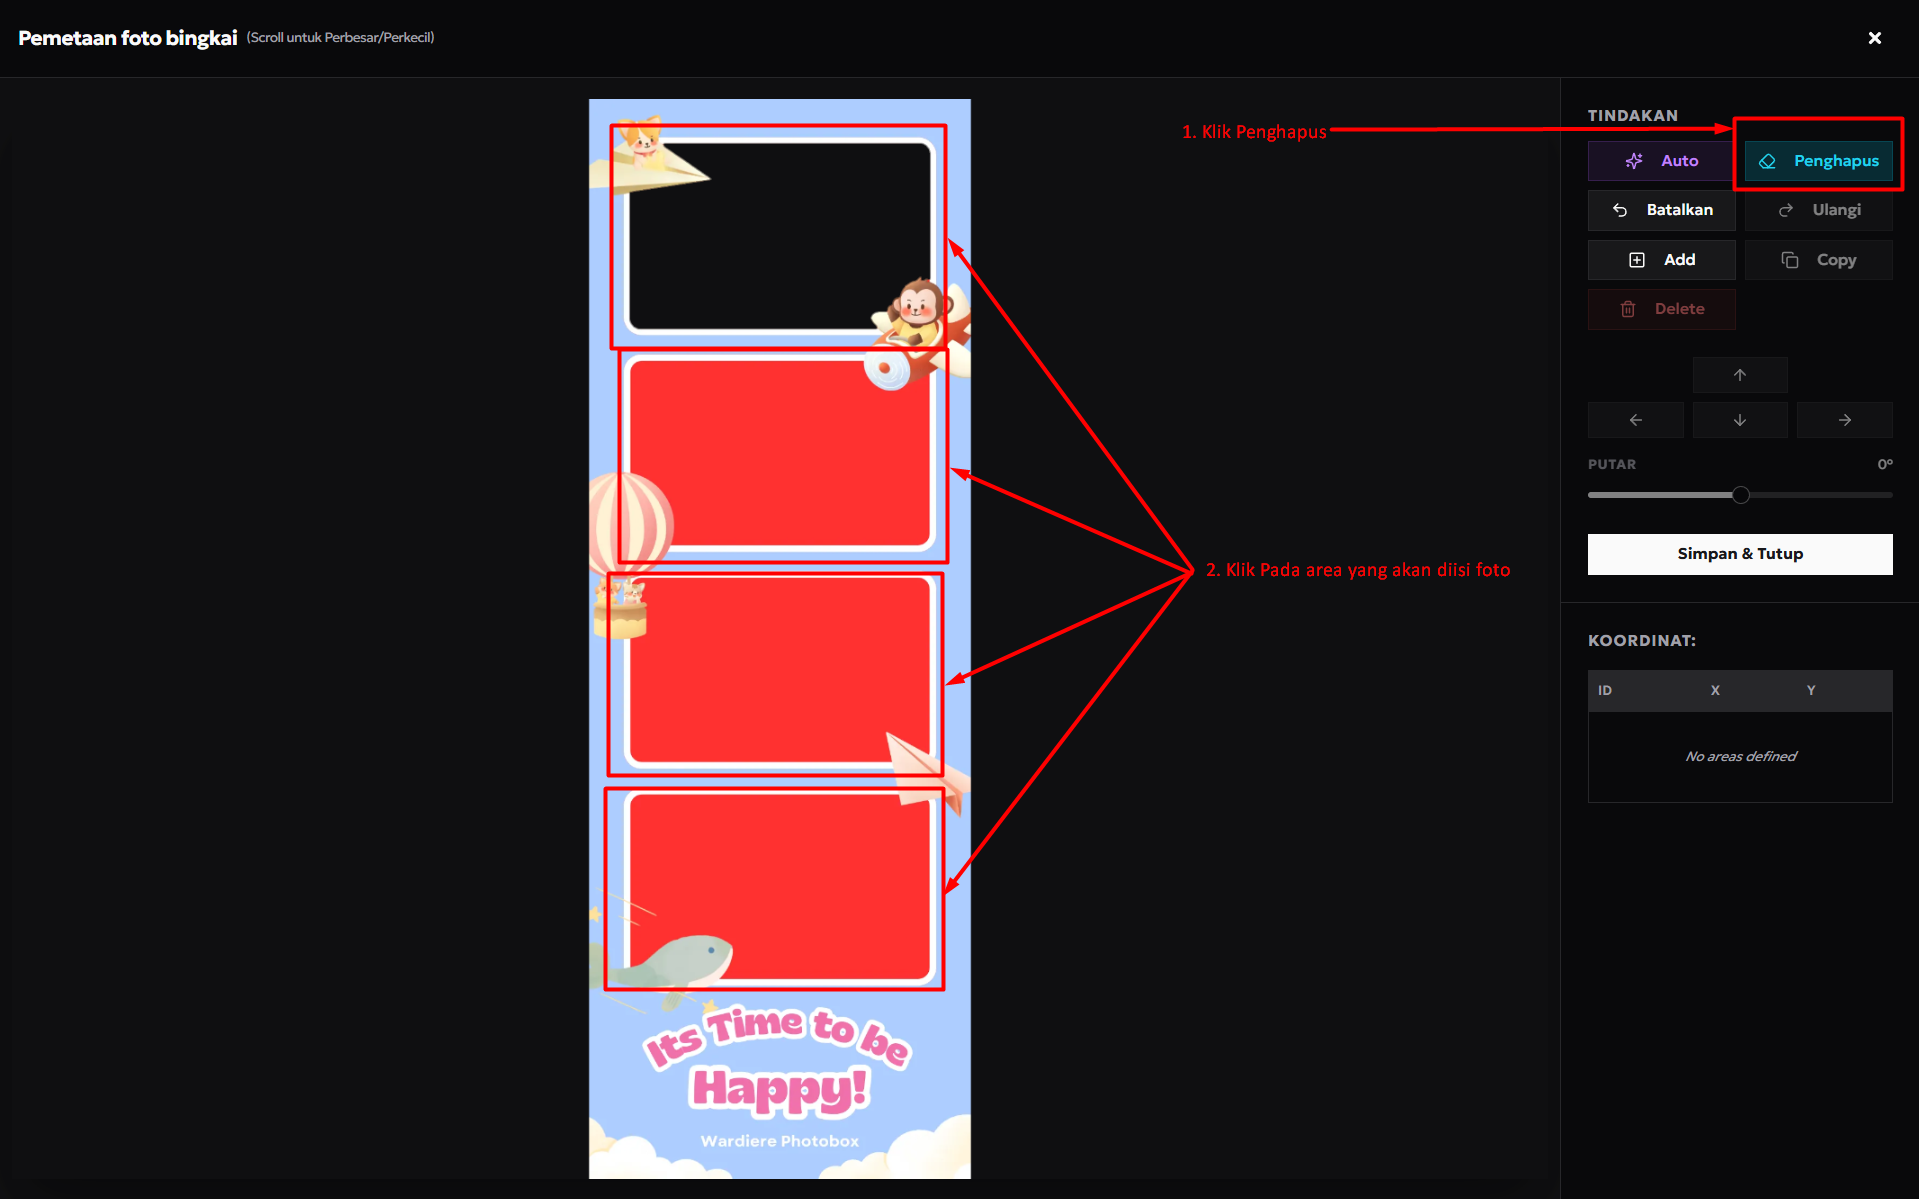
4. Cutting out the frame to be filled with a photo.
Click the eraser button and click on the area you want to erase, to cut out the part you want to fill with a photo. 👇
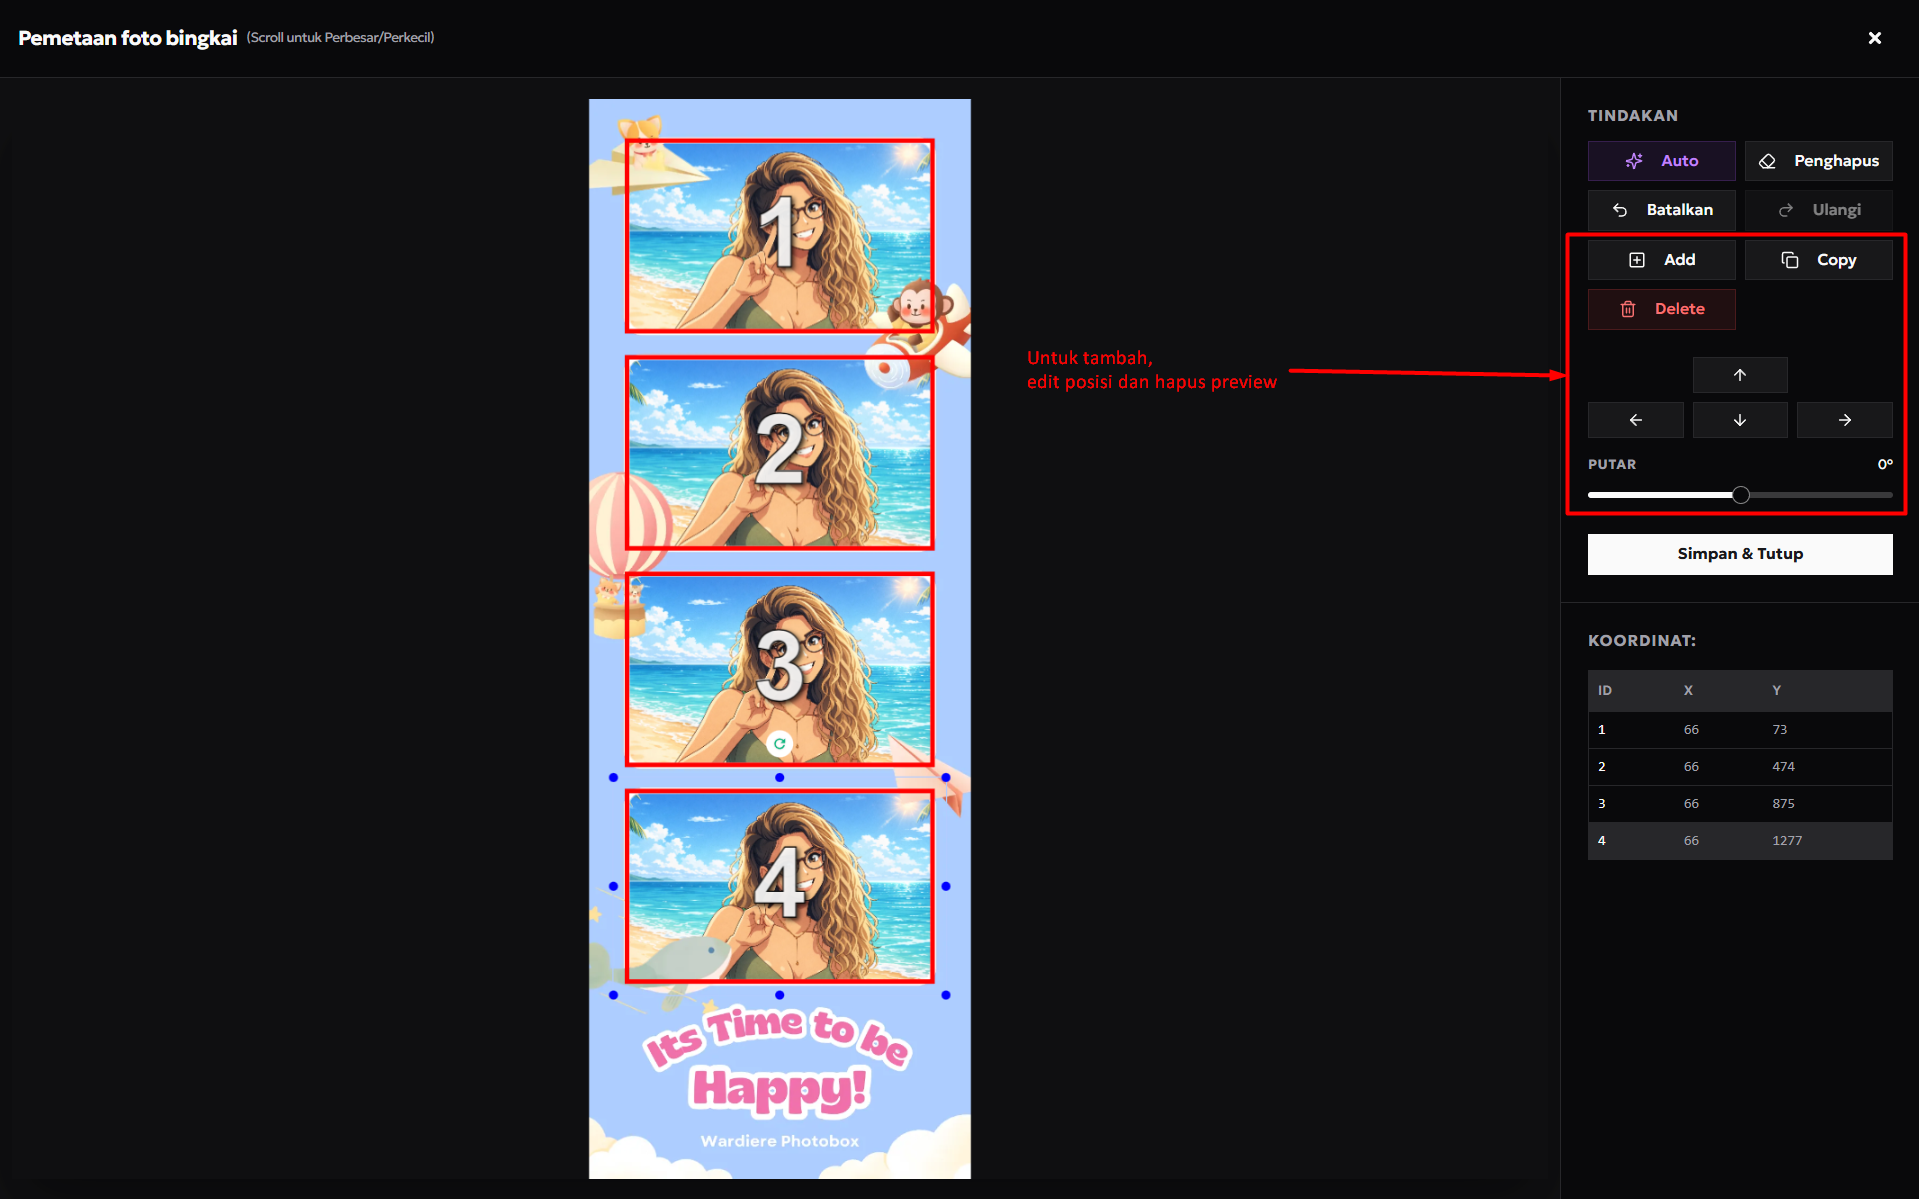
5. Mapping the area to be filled with a photo.
Once the cutout is done.
- Click the Auto button. A preview will automatically appear afterwards.
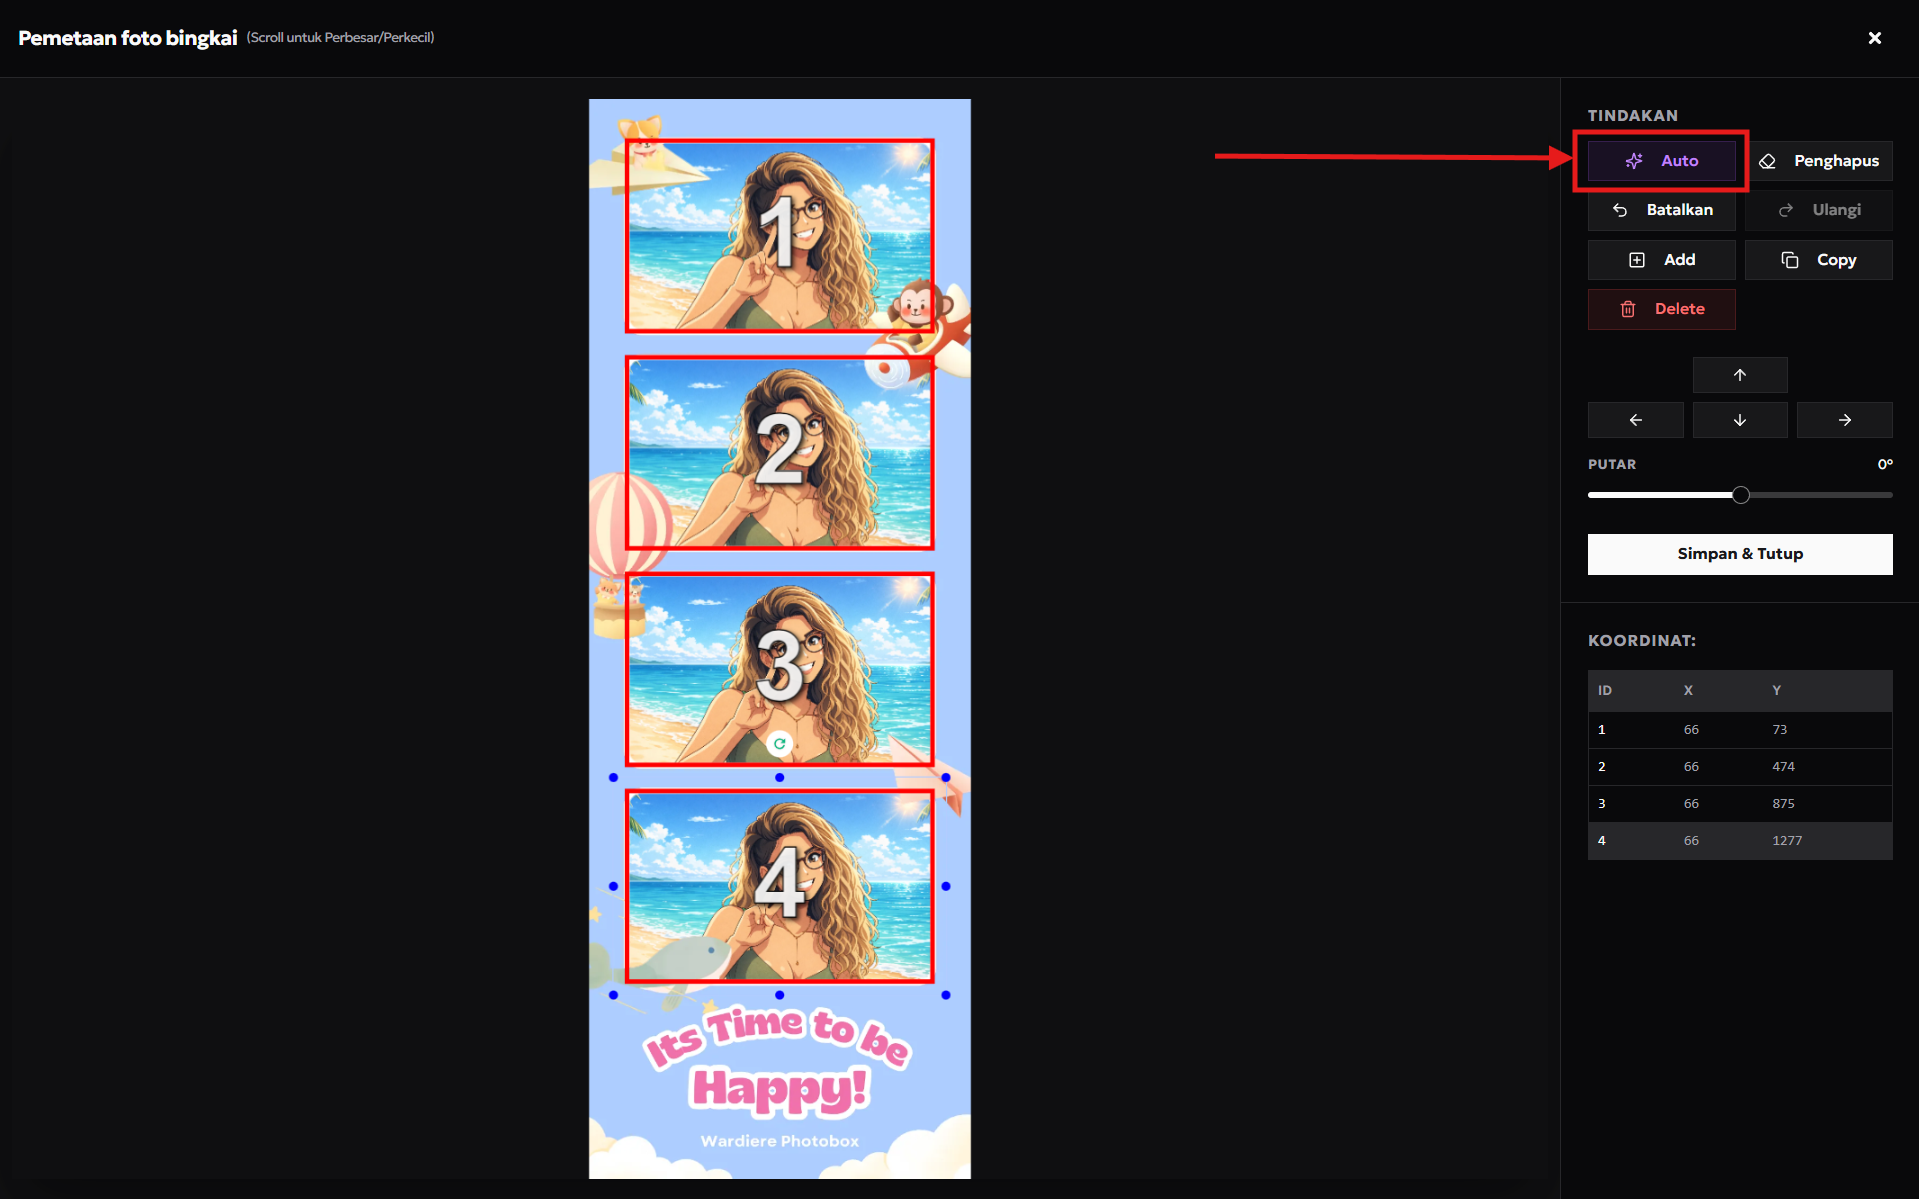
- Make sure the preview is correct and the total number of photos is correct.
- You can drag the preview to adjust its position if it seems off.
- And use scroll to zoom in and zoom out.
- If there is an extra preview you can click the Delete button.
- If there is an extra preview or it still doesn't look right, you can use the following buttons 👇
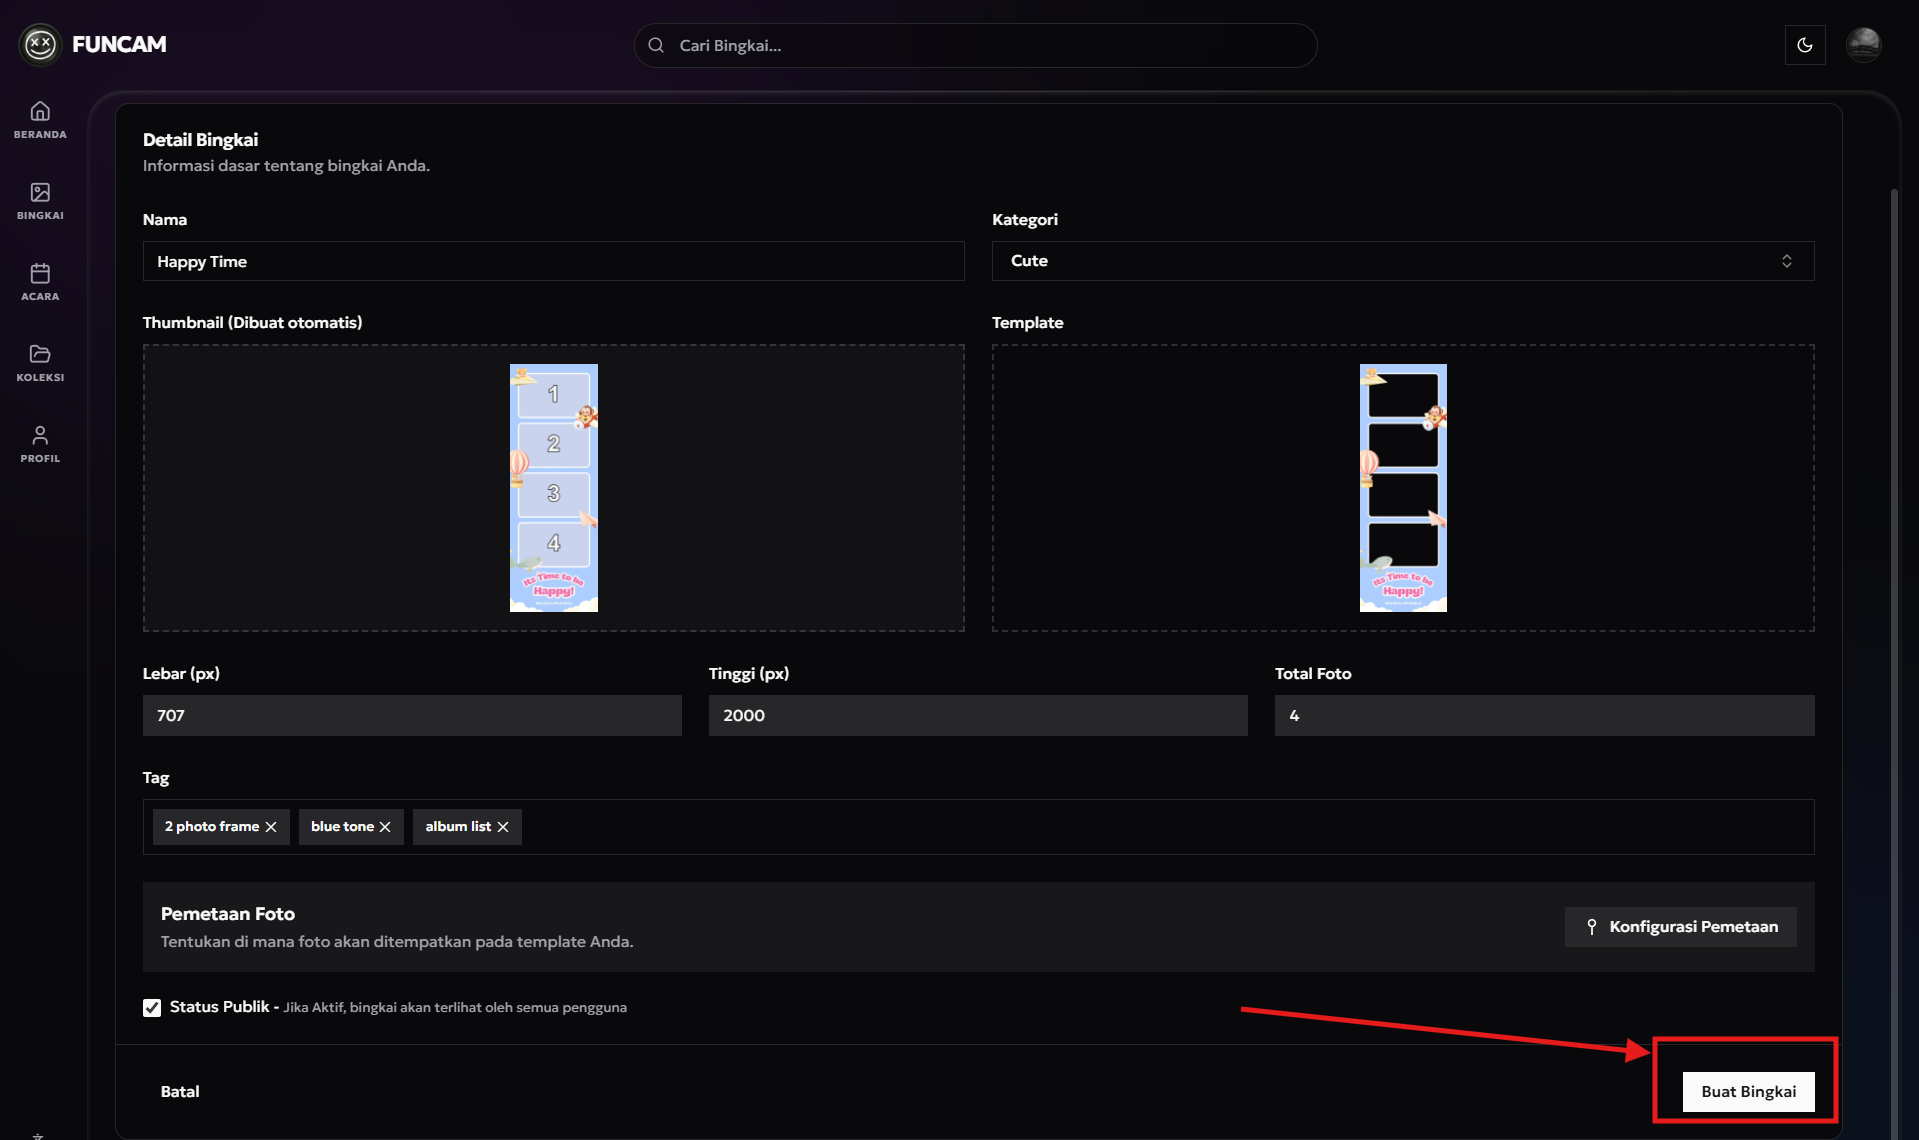
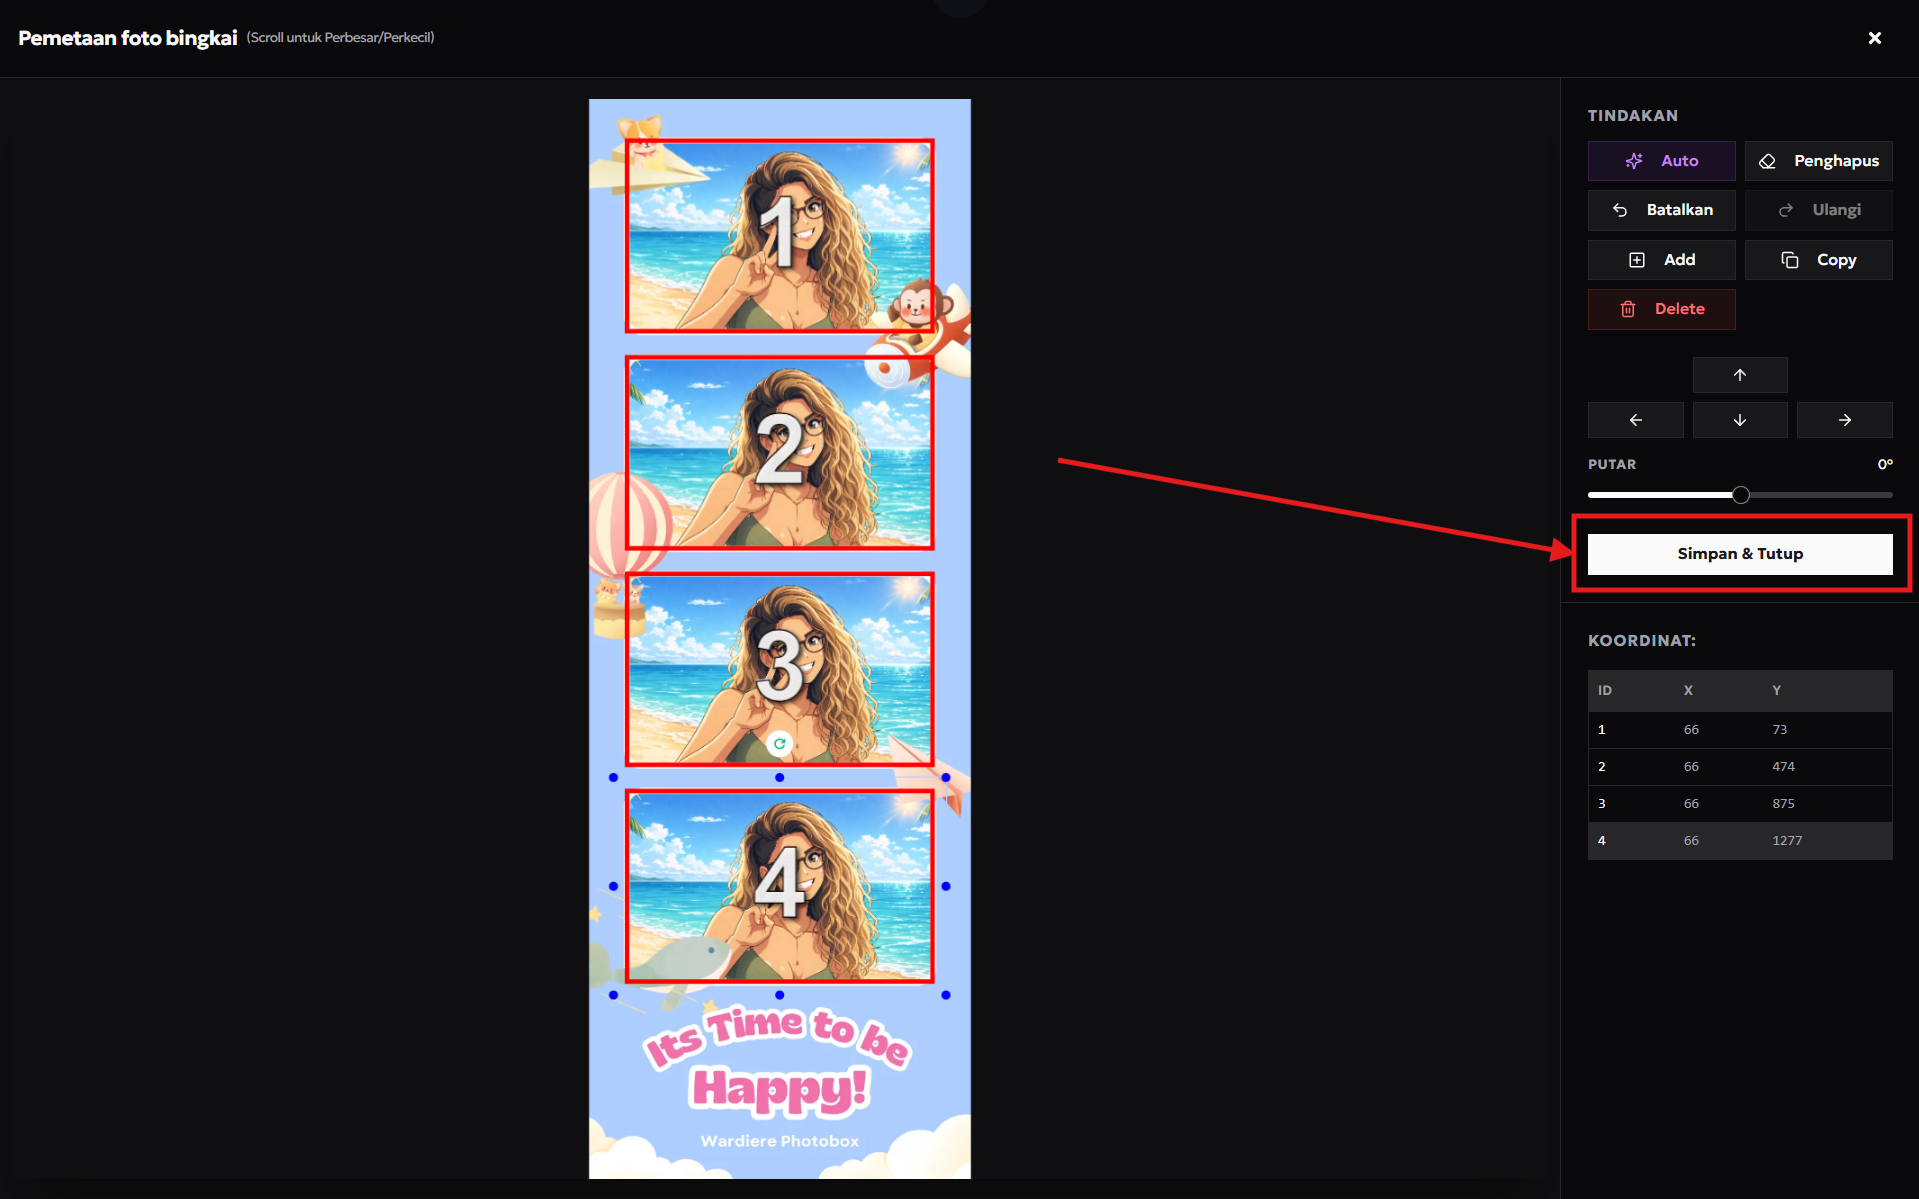
6. Once everything is done, click Save & Close
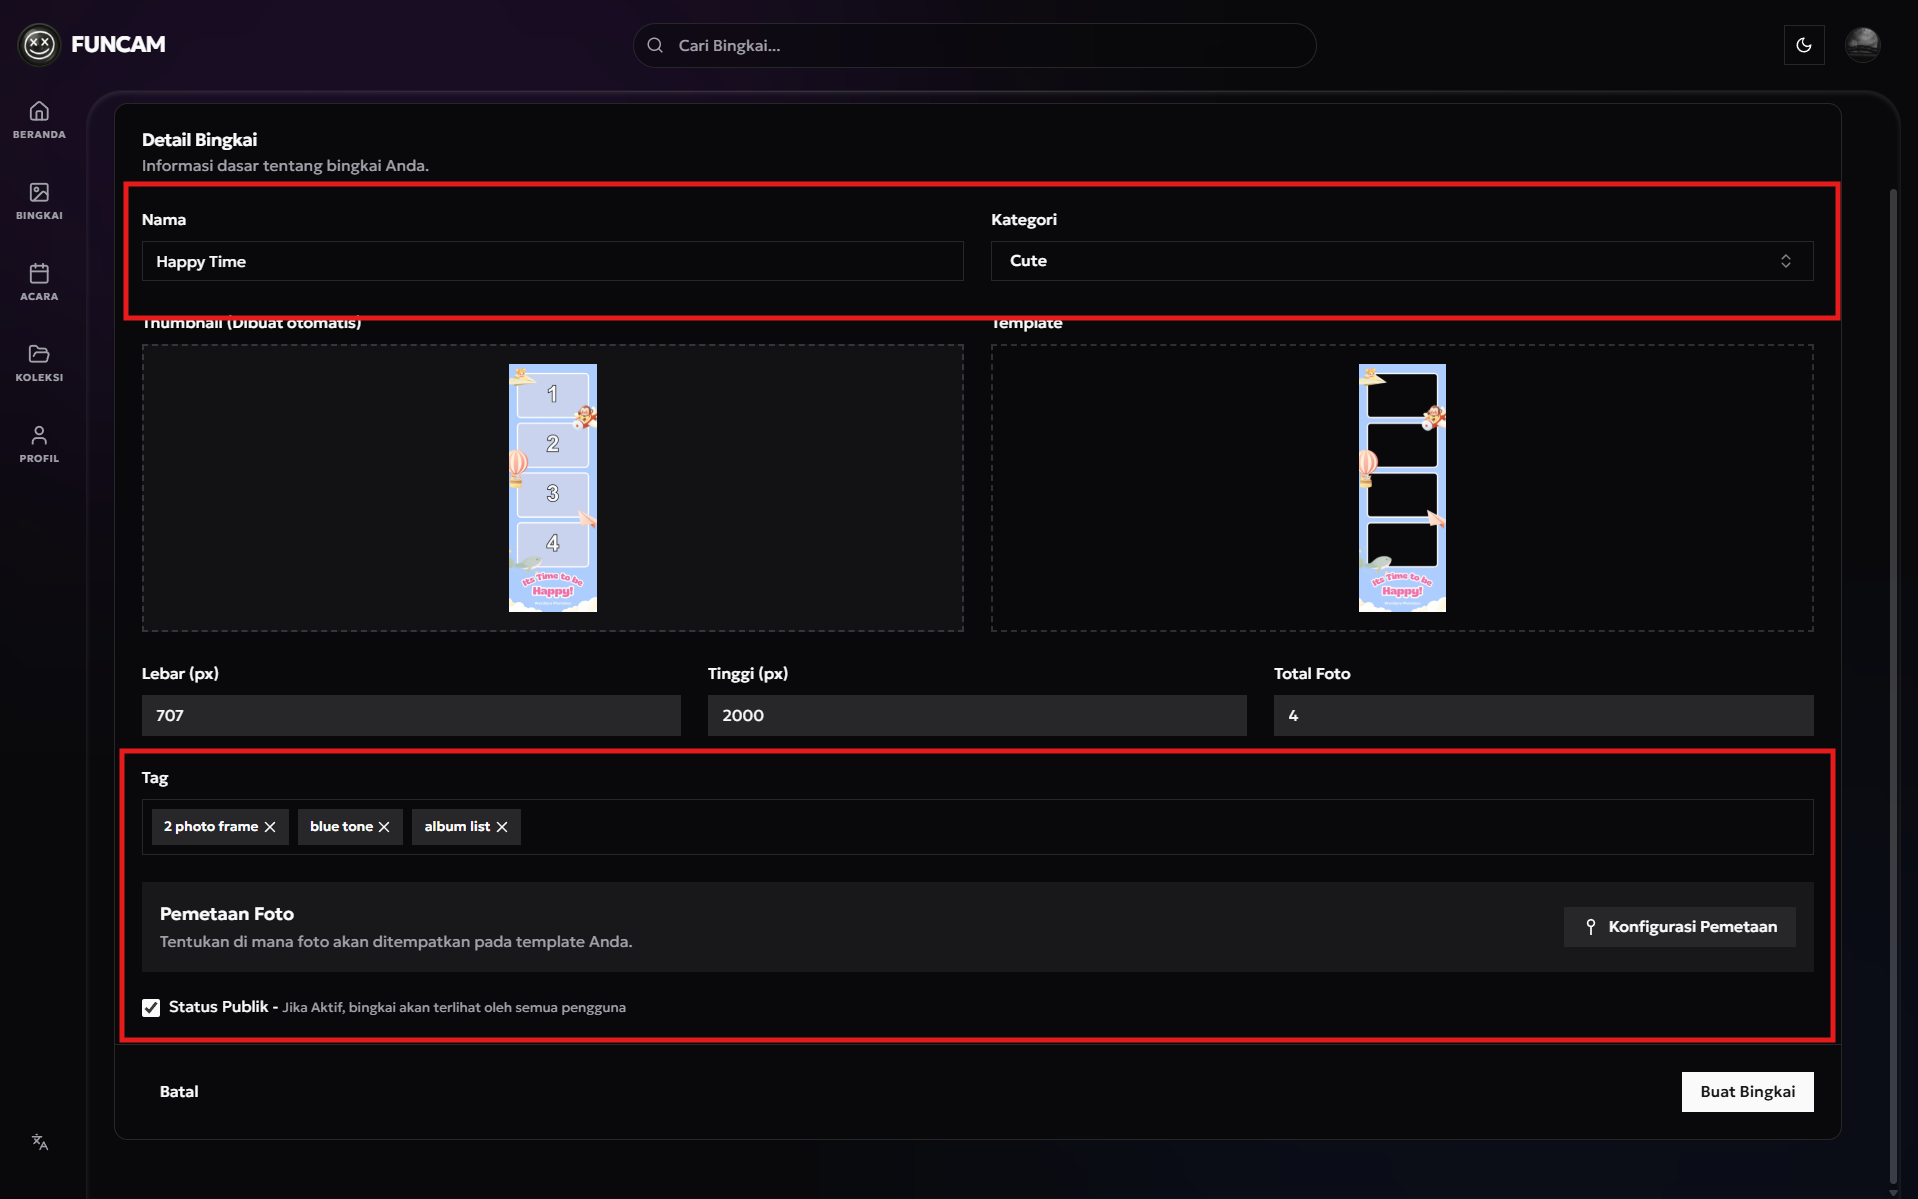
7. Complete your frame information such as Name, Category, and Tag.
If you don't want your frame to be visible to the Public, you can uncheck the Public Status checkbox.